Living with a Cloud PC
2023-12-04 1 Comment
About a year ago I began the journey into Windows 365 Cloud PCs. As an IT consultant I need access to a set of tools. One of the tools I’ve used extensively is Windows 365. With Windows 365 I have all of the corporate applications and data that I rely on conveniently available on a single Cloud PC. From any device with a web browser – Windows, Apple or Android – I can connect to my Cloud PC and be productive in seconds. I spend most of my workday in my cloud PC, switching between the Windows 365 Cloud PC and my host desktop as required.
Recently Microsoft made Windows 365 Switch available for Windows 11, making it incredibly simple to switch between the local Windows 11 desktop and my Windows 365 desktop.
Set Up Windows 365 Switch
First you will need to add your Windows 365 Cloud PC to the Task View on your Windows 11 desktop. Task View is not new to Windows 11, but personally I have never used the Task View before, so I had to dig a bit to figure out what they were talking about. All you need in order to set up Windows 365 Switch is Windows 11 Enterprise (or Professional) running version 22621.2361 or later and a Windows 365 Cloud PC license assigned to you. Your Cloud PC must also be running Windows 11.
In the Windows App (which you can download from https://windows365.microsoft.com/) you will see all of the Windows 365 Cloud PCs associated with your account. Select the ellipses beside the “Connect” button on the one you would like to switch between and select “Add to Task view.”

That’s it. Really. There is nothing more to do to expose the end-user experience.
Using Windows 365 Switch
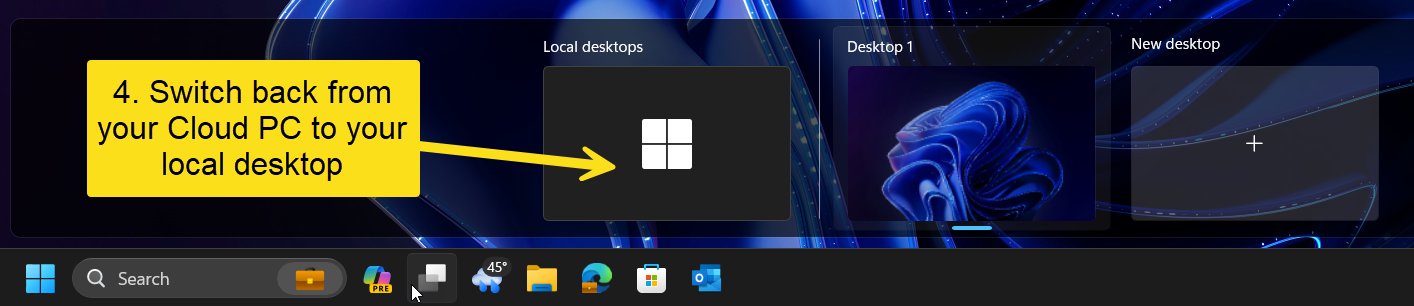
Now on your Windows 11 desktop you will need to locate the Task View icon from your taskbar. Hover over or click on the Task View icon and you will see the desktop you are currently logged into (Desktop 1 in my case). You will also see the option to connect to your Cloud PC.

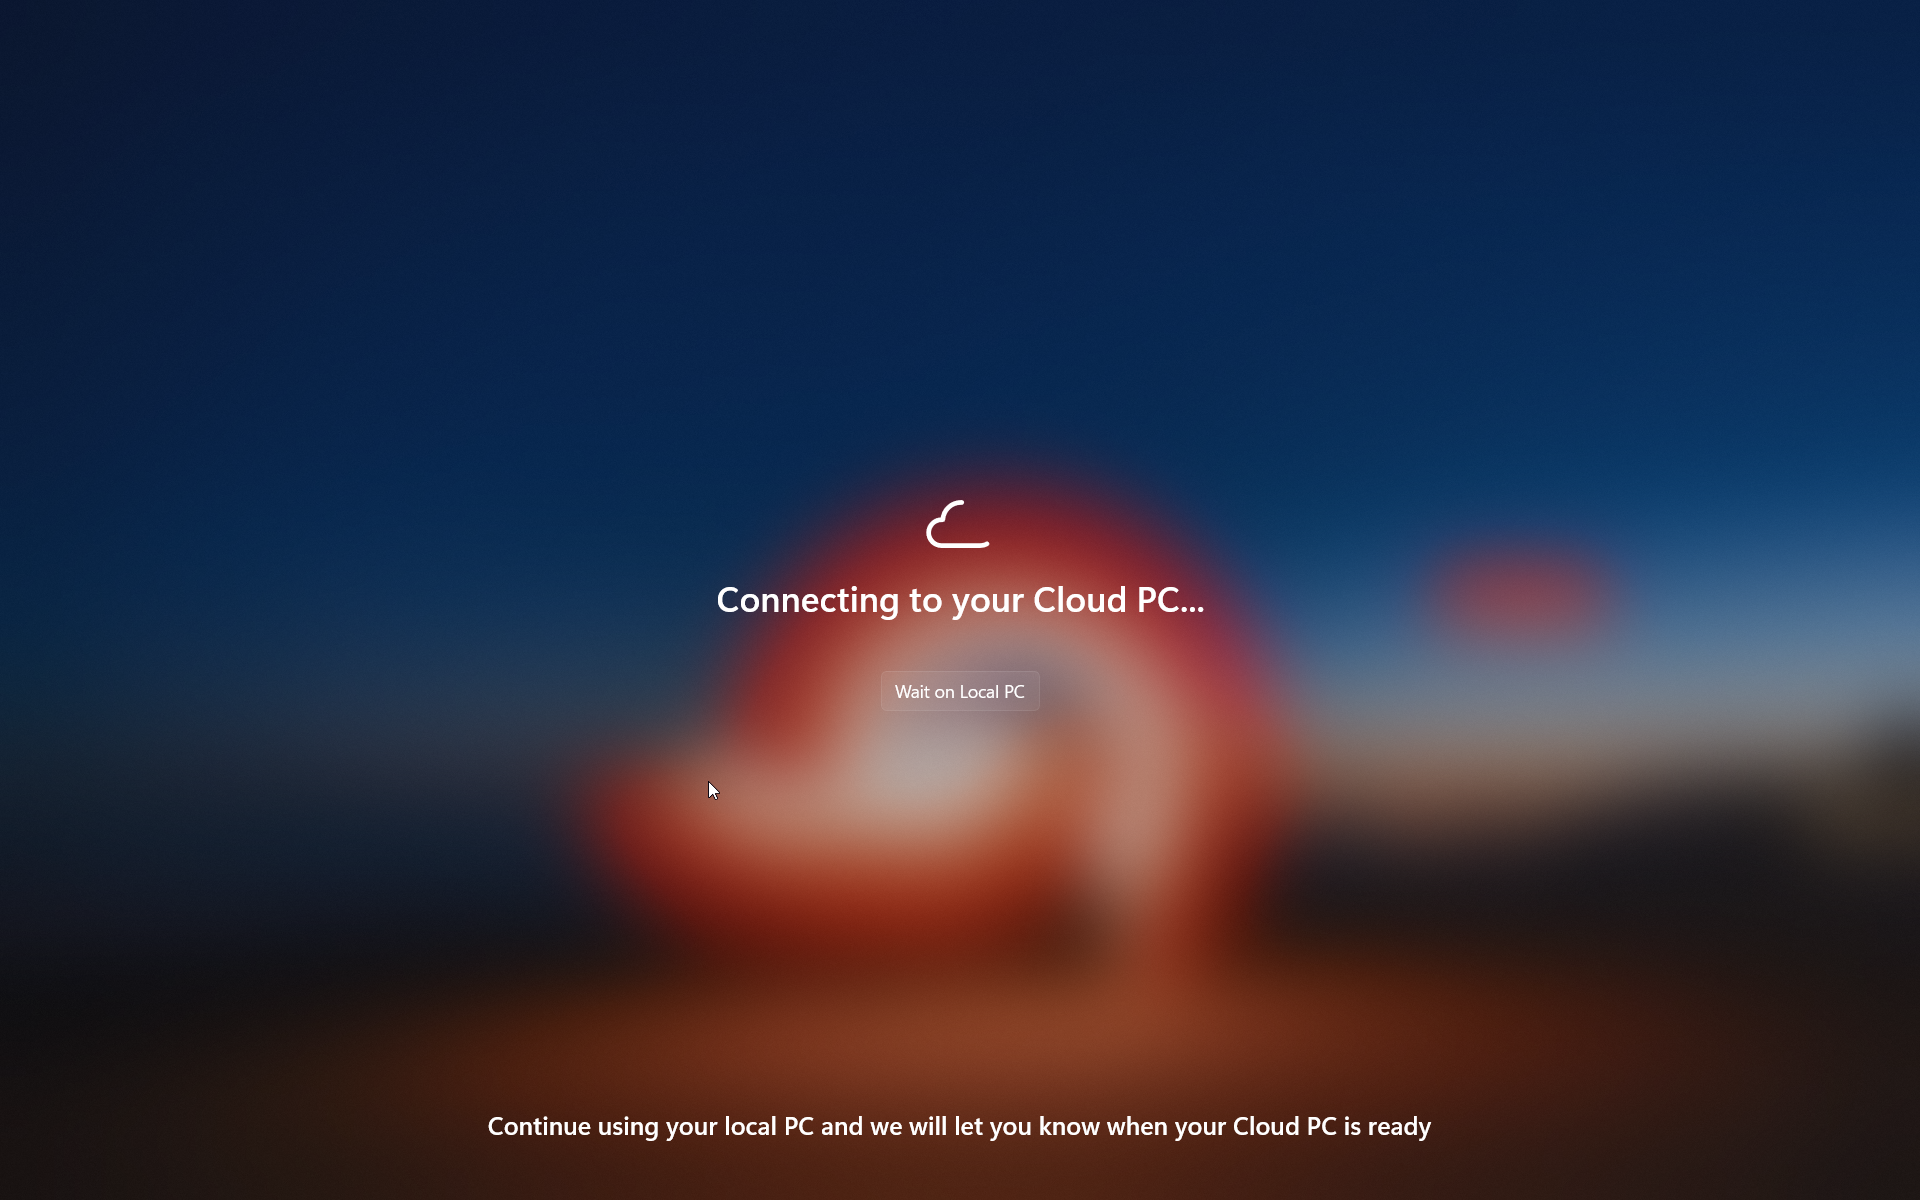
Click on your Cloud PC and you will see a notice that the connection to your cloud PC is being established. Seconds later you will be switched to your Cloud PC.
Switching back to your local desktop from your Cloud PC is equally simple. In your cloud PC just hover over the Task View icon and select “Local desktops”. Seconds later you will be back on your local desktop.
It’s so simple I was tempted not to even post about the feature, but if you have a Windows 365 PC that you use this feature so easy to use I really wanted to share it.
One last word. Windows 365 Boot is another recent addition to the Windows 365 offering. This feature allows you to set up a Windows 11 computer to boot directly into the Cloud PC rather than into the local desktop. I am using Windows 365 Boot on an older Microsoft Surface laptop whose age was beginning to show. The CPU, memory and storage were no longer enough for my needs, but it still worked great. I repurposed the device to run Windows 365 Boot. Now when I turn on the device, I enter my Windows 365 Cloud PC credentials at the login screen and am immediately working in my cloud PC with no local desktop to switch from. Simple to set up, and a great user experience as well.

Pingback: Weekly Newsletter – 2nd of December to 8th of December 2023 - Windows 365 Community